It’s always best to lay a laminate, wood or tiled floor
before you install any skirting boards to ensure the neatest finish. If you
will be carpeting the space, then it’s worth fitting the skirting boards first.
Carpet fitters like to work to a clean, straight edge, which skirting boards
provide, and it also means you won’t need to rip out the skirting every time
you come to replace your carpet.
1.
Use a tape measure to work out the length of
skirting board you need and then add 20 per cent on to the total as a
contingency.
2.
Mark clearly on each piece of skirting board
which side you want facing into the room and which way up you want it to avoid
any mistakes.
3.
Start with any boards that can go in with
square-edged cuts at either end, for example, either side of a chimneybreast.
Measure and then use a mitre saw or mitre box to give a good, straight cut.
4.
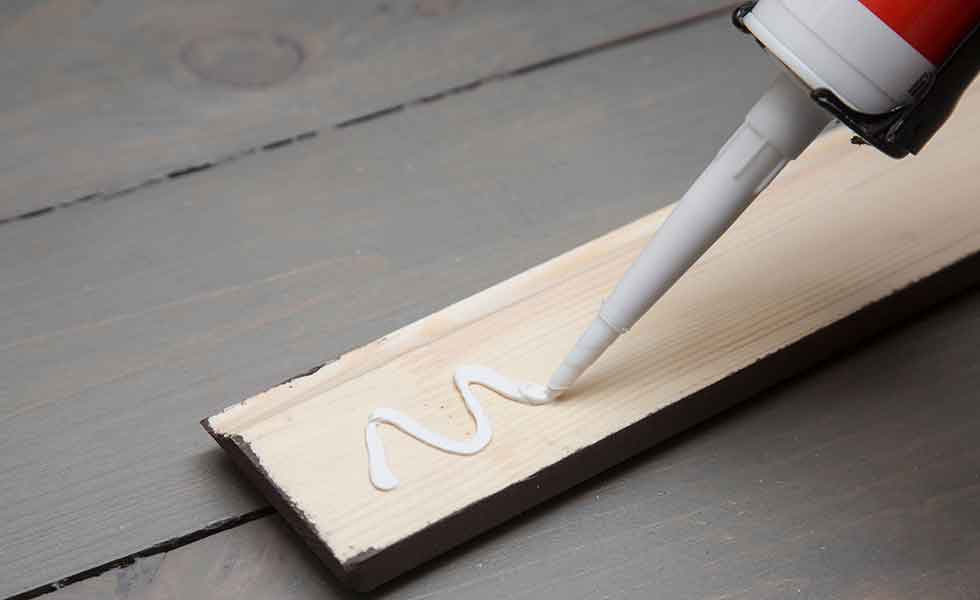
Instant-grab adhesive is the most popular way of
fixing boards, particularly in houses with plasterboard walls. Apply blobs and
press the board onto the wall so the adhesive makes good contact, then wipe off
any excess.
If you want to screw the boards to a plasterboard wall, mark
the position of the wooden studs and then put a pilot drill through the
skirting board and the wall at these points. If you are fixing to a solid wall,
run a pilot drill through the skirting board to mark the wall every 6cm. Drill
and rawlplug these holes. Countersink the holes with a larger drill bit so the
screw heads will disappear when fixed. Screws should be long enough to go
through the board and at least 3cm into the wall or studs behind. Use wood
filler to cover the holes before painting.

5
The next board you fit needs to be ‘scribed’ so
it slots into the first board you have attached to the wall. To do this, first
cut a 45-degree angle in the end of the new piece of board using a mitre saw or
mitre box. Then, use a coping saw to cut away the waste section. You’ll be left
with the profile of the skirting board that will slot onto the section that is
already attached to the wall. Practise with an off-cut first.
6
Check the board you’ve just cut fits cleanly
with the one you’ve already attached to the wall. If you’re happy, cut or mitre
the other end of the board and then attach to the wall. Plan the way your
boards go in so that you’re always fitting a square end to a scribed end, never
scribe both ends

7
Where the boards meet on an external corner,
mitre both pieces at a 45-degree angle to create a neat join. Measure both
boards to the corner and then mark this length on the back. Place the first
board on the mitre, line the saw, set at 45 degrees, up with the mark you made,
and cut.

8
Make sure you cut the second board so that the
45-degree angle is in the opposite direction so that they meet. Create the
opposite cut by moving a mitre saw to the other side of its axis.
9
Always fit mitred external corners in pairs so you
can adjust them to fit together accurately, rather than attaching one and then
trying to cut another to fit.
10
Once complete, fill any gaps between the wall
and the top of the skirting board with decorator’s caulk and then run a damp
finger along the join for a neat finish. Allow to dry before painting.
No comments:
Post a Comment